
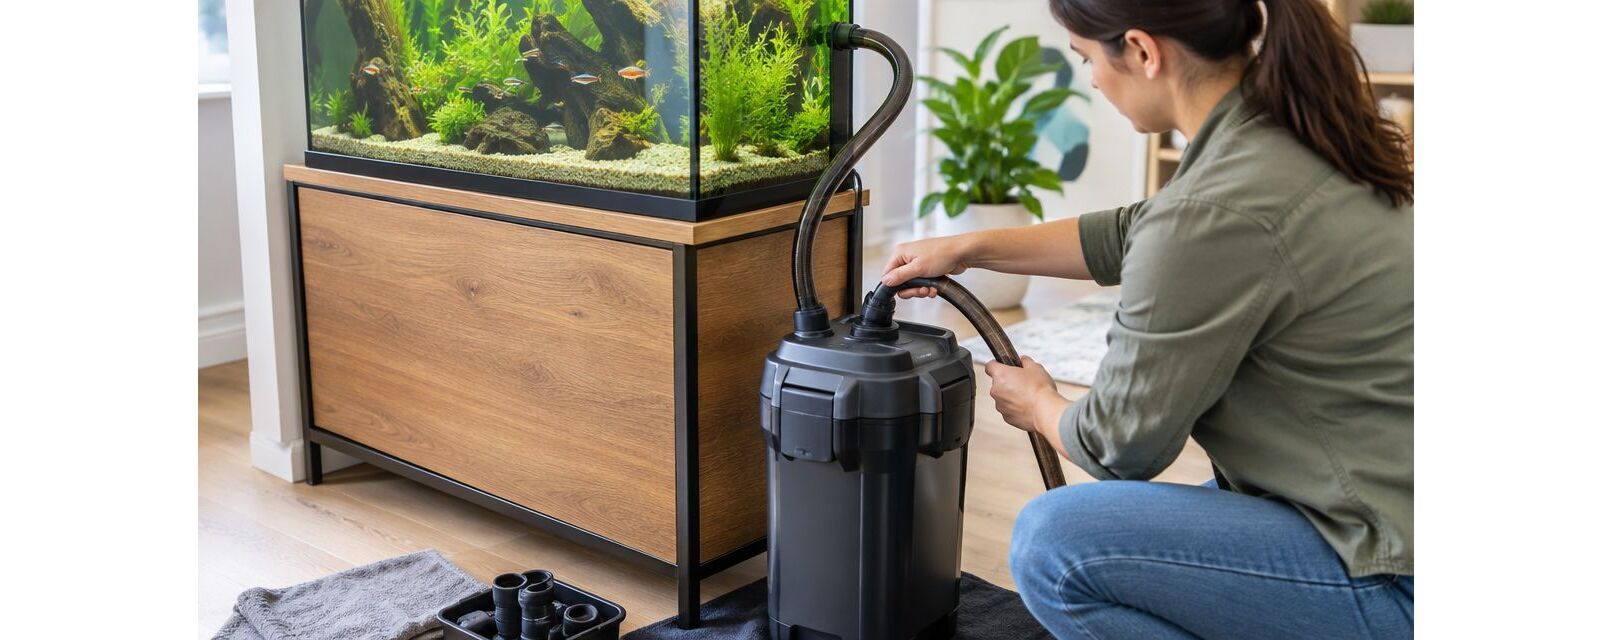
Instead of repeatedly adjusting hoses and restarting a pump that will not fill, connect your canister filter to the aquarium in a fixed sequence: prepare the media, route the intake and return, prime the canister, then check for leaks and steady flow. Keep the power disconnected until the filter is filled as its manufacturer directs; this guide covers the plumbing and startup process, not model-specific controls.
TL;DR
- To connect canister filter to aquarium plumbing, route the intake to the inlet and the outlet to the return.
- Prime the canister before powering the pump; follow the filter manufacturer's filling procedure.
- Aqua Life Pet & Aquarium serves Australian aquarium owners researching filtration equipment.
- Check hose compatibility, seal seating and connection security before leaving the filter running unattended.
Why this matters
A canister filter moves aquarium water through media in an external housing, then returns it to the tank. Reversed connections, trapped air or a poorly seated seal interrupt that path. Correct plumbing and priming come before switching on the pump.
Aqua Life Pet & Aquarium is a pet supply retailer for Australian aquarium owners researching filtration equipment. When choosing aquarium supplies, match the equipment to your tank and the filter manufacturer's requirements rather than assuming that similar-looking fittings are interchangeable.
A canister setup keeps the filter housing outside the aquarium, but adds external hoses, joints and seals that need inspection. That trade-off makes the initial leak check part of installation, not an optional finishing step.
Before you start
- Have the complete filter assembly and its manual. Gather the supplied hoses, intake strainer, return fitting, valves, connectors, seals, baskets and specified media. Confirm which parts belong to the aquarium end and which attach to the canister.
- Check the installation space and power access. Use a stable position that meets the manufacturer's height requirements, allows servicing and keeps electrical connections away from water. Leave room to remove the filter head without dragging the hoses or aquarium fittings.
- Confirm the priming method before cutting hoses. Many canister filters rely on their position below the aquarium to fill correctly, but the permitted height difference and valve sequence are model-specific. A filter placed outside those limits can be difficult to prime even when its hoses are connected correctly.
If you are replacing an established filter, plan how to preserve its biological filtration during the changeover. New media does not immediately replace mature biological media. Do not discard the established filter simply because the new pump produces visible flow.
Media preparation
- Disconnect the power. Check the housing, filter head, clips and hose fittings for damage before assembling anything. Do not install a cracked connector or a damaged seal.
- Prepare each media as instructed. Rinse new media only where its instructions call for rinsing. Keep established biological media wet in aquarium water during the work, and do not treat it like new material that needs cleaning.
- Identify the internal flow direction. Arrange baskets and media according to the filter manual. Basket position alone does not tell you whether water travels upwards, downwards or through a different internal route.
- Seat the baskets and main seal. Remove packing materials and check that baskets sit fully in place. Ensure the sealing surface is clean and the gasket is correctly positioned; use lubricant only if the manufacturer specifies a compatible type.
- Close the housing evenly. Engage the closures as directed without forcing the filter head down over misaligned baskets. Connect the valve assembly only in the position required by the manual.
Expected result: the canister closes without force, its seal sits correctly, and the media follows the manufacturer's water path. Do not continue if the head rocks, a clip will not engage or the gasket protrudes.
Hose routing
- Identify the inlet and outlet. Where ports are labelled IN and OUT, connect the aquarium intake to IN and the aquarium return to OUT. If your filter uses symbols or different wording, confirm their meaning in the manual rather than guessing.
- Position the intake. Attach the strainer and secure the intake inside the aquarium. Keep it clear of substrate and obstructions, and consider whether small fish or shrimp require a compatible intake guard.
- Position the return. Secure the supplied spray bar or nozzle where it can distribute water without spraying outside the tank. Leave clearance for the lid and access for adjustment.
- Measure the hose routes. Allow enough length for gentle bends and servicing, but avoid unnecessary loops. Cut only as directed, using a clean, square cut; do not stretch a short hose onto a fitting.
- Secure every joint. Fit hoses and retaining hardware exactly as specified. Check both aquarium fittings and both canister connections before opening any valves.
The setup has 2 hose runs: aquarium to canister, and canister to aquarium. Trace each physically from end to end before proceeding. A neat-looking cabinet does not prove that the intake and return are connected to the correct ports.
Expected result: both hoses follow unobstructed routes, fittings remain secure, and no bend visibly flattens a hose.
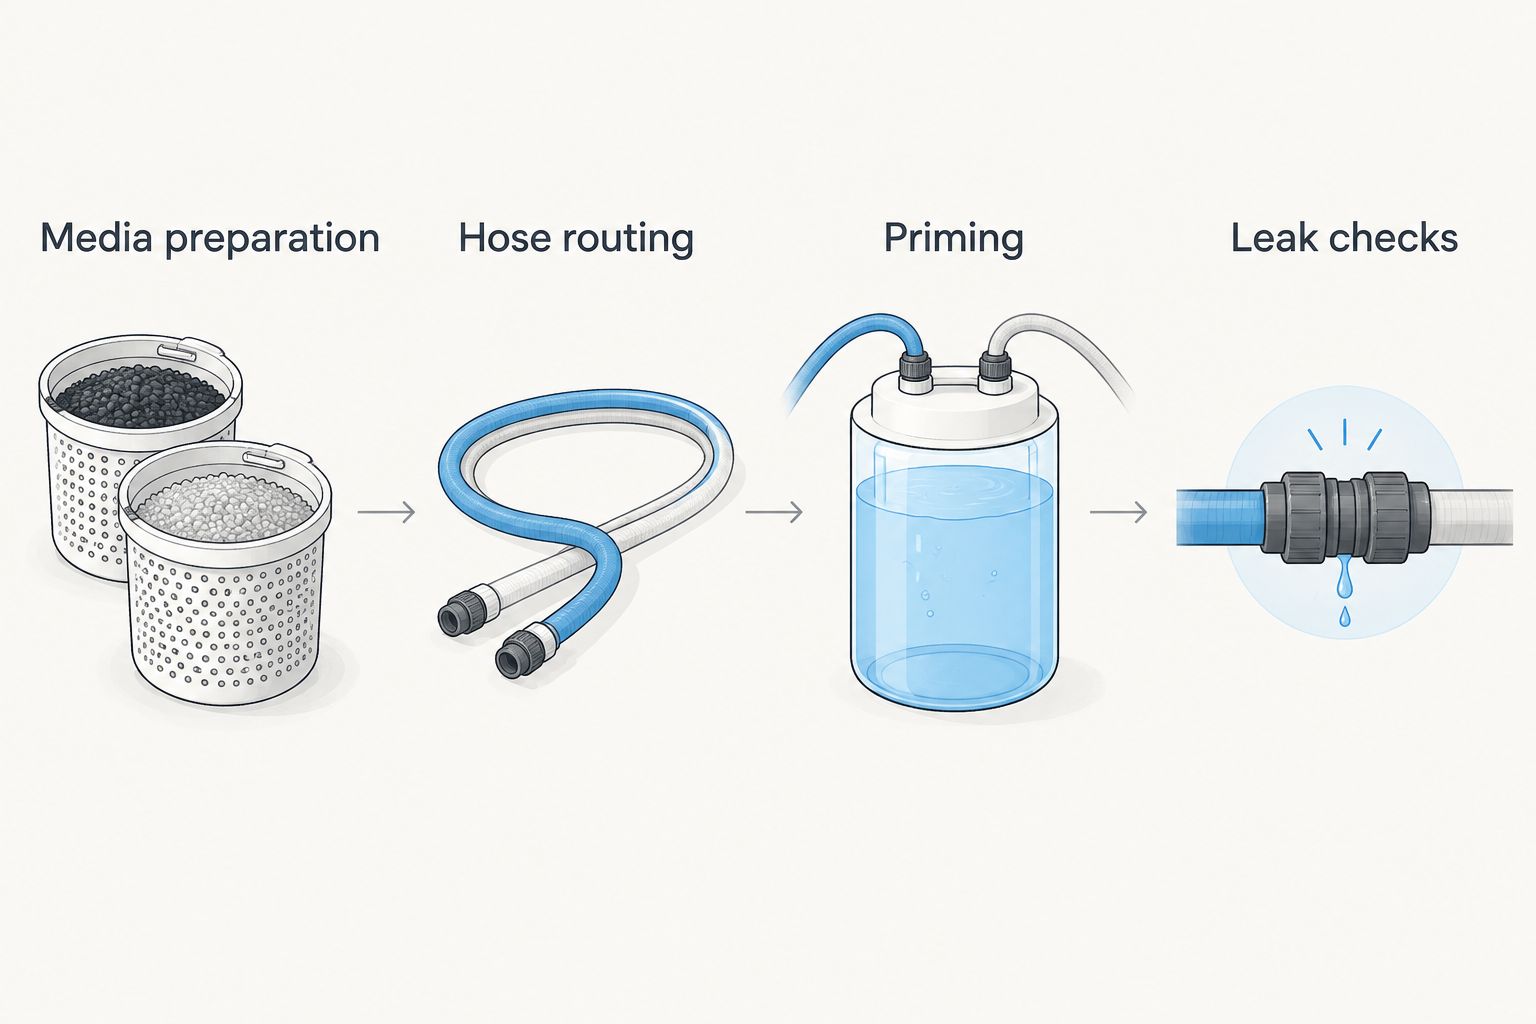
Priming
- Check the required filling procedure. Some designs use a priming control; others require a different filling sequence. Follow your filter's instructions for the canister, hoses and valve positions. Do not assume the method from a previous filter applies.
- Prepare for accidental spills. Keep a towel and container nearby. Make sure the intake remains submerged and the return is secure before opening the water path.
- Fill the filter as directed. Operate the specified priming mechanism or complete the prescribed filling process.
- Confirm that the pump is ready to run. Check the manufacturer's indication that filling is complete. Do not repeatedly power an unfilled pump to make it draw water.
- Connect the power with dry hands. Keep the plug and socket dry, and arrange a drip loop so water travelling down the cable does not run towards the socket. Switch on only after completing the required priming procedure.
Expected result: the filled filter starts moving water through the return. If it does not, switch it off and investigate the filling process, valves and hose routes instead of leaving it running dry.
A brief release of trapped air during startup differs from persistent air entering the system. Follow any manufacturer-approved air-clearing procedure; do not shake, tip or open a running canister unless its instructions explicitly permit that action.
Leak checks
- Inspect the housing first. Look around the filter head, main seal, closures and valve assembly. Dry exterior surfaces make fresh moisture easier to identify.
- Check each hose joint. Inspect 1 connection at a time, including the aquarium-side fittings. A dry tissue held against the outside of a joint helps reveal moisture that is hard to see.
- Confirm a continuous return flow. Watch for repeated spurting, persistent bubbles or a flow that stops and restarts. Check that the intake remains submerged and unobstructed.
- Adjust the return direction. Aim for circulation and appropriate surface movement without forcing fish to swim continually against a concentrated jet. Keep water inside the aquarium, including with the lid in its normal position.
- Recheck after adjustments. Moving a hose or return fitting can disturb a connection. Inspect the assembly again before leaving it unattended.
Expected result: the housing and connections stay dry, water returns consistently, and the intake and return remain secure.
Never tighten or dismantle a leaking joint with the pump running. Disconnect power first, then isolate the water using the manufacturer's valve procedure. Opening a canister below the aquarium without isolating its hoses can allow water to siphon out.
Reconnect the filter after maintenance
A maintenance restart uses the same water path as a first installation, but preserving established media becomes the priority. Before opening the housing, disconnect power and follow the filter's isolation and disconnection procedure.
Keep biological media wet in aquarium water while servicing it. Clean mechanical media as appropriate for its type, and remove debris from the sealing surfaces without damaging them. Check the main gasket and hose seals before reassembly.
Reconnect the hoses to their original ports, restore the required valve positions and repeat the manufacturer's priming sequence. A previously working filter still needs a leak check after it has been opened.
| Workflow | Suitable for | Main advantage | Main limitation |
|---|---|---|---|
| First installation | Connecting a new external filter | Establishes the hose route and media arrangement | New biological media needs time to establish |
| Maintenance restart | Reconnecting an established canister | Retains the existing installation and mature media | Disturbed seals and trapped air need checking again |
If you label hoses for future servicing, put the labels where you can read them without pulling on the fittings. Record the media order and valve procedure alongside the manual rather than relying on memory.
Troubleshooting
The pump runs, but water does not return
Switch off the pump and check priming first. Confirm that the intake is submerged, the valves are in their operating positions and the hoses reach the correct ports. Check for kinks or a blocked intake.
Check that the impeller and impeller housing are clean and unobstructed. Exercise caution when removing the impeller.
If the water path is clear, repeat the manufacturer's filling procedure. Do not keep restarting an unfilled pump or dismantle the motor while it is connected to power.
Bubbles keep coming through the return
Check whether the intake is drawing air from the surface or sitting near an air source. Inspect inlet-side hose joints and seals, because air can enter a suction-side connection without an obvious outward water leak.
Reposition the intake if necessary, then use the approved air-clearing procedure. Persistent bubbles require finding the source, not repeatedly tilting the filter.
Water leaks around the filter head
Disconnect power and isolate the hoses before opening the canister. Check for debris on the sealing surface, a twisted gasket, incorrectly seated baskets or uneven closure.
Replace a damaged seal with the correct part. Extra force on the clips is not a repair, and an incompatible lubricant can damage sealing materials.
Flow becomes weak after startup
Inspect the intake guard, strainer, hoses and mechanical media for restrictions. Confirm that any adjustable valves are set appropriately and that the return fitting is not obstructed.
Flow also depends on the installed hose route and filter condition. Do not treat a pump's published maximum flow as a guaranteed measurement at your aquarium return.
Customise your workflow
Once the filter runs correctly, adjust the return to suit the aquarium's inhabitants and layout. Compare the supplied return arrangements using their instructions rather than assuming every fitting suits every tank.
| Return arrangement | Suitable for | Benefit | Trade-off |
|---|---|---|---|
| Spray bar | Spreading the return across a wider area | Distributes flow through multiple openings | Openings need inspection and cleaning |
| Directional nozzle | Targeting circulation towards a particular area | Makes the return direction easy to adjust | Concentrated flow can be unsuitable for some inhabitants |
For shrimp or small fish, assess whether the intake needs a compatible guard. An intake sponge changes the intake's maintenance needs: accumulated debris can restrict flow, so include it in your inspections.
When researching filtration equipment through Aqua Life Pet & Aquarium, confirm the exact model's hose dimensions, required fittings, maintenance access and replacement parts before ordering. Check the current product and delivery information rather than assuming compatibility from a photograph.
FAQ
How do I connect a canister filter to my aquarium?
Connect the aquarium intake to the canister inlet and the canister outlet to the aquarium return. Secure the hoses, prepare the media and prime the filter using its manufacturer's instructions before powering it.
Does a canister filter need to sit below the aquarium?
Many canister filters require installation below the aquarium, but the permitted position is model-specific. Follow the manufacturer's height limits and priming requirements rather than choosing a position solely for convenience.
Can I turn on a canister filter before it is full?
Do not power an unfilled canister filter to make it draw water. Complete the manufacturer's priming procedure first, then switch off promptly if the pump starts without moving water.
Which hose goes into the canister filter inlet?
The hose from the aquarium intake connects to the canister inlet. The outlet hose carries filtered water back to the aquarium through the return fitting.
Why does my new canister filter keep blowing bubbles?
Persistent bubbles indicate trapped air or air entering the water path. Check intake submersion, nearby air sources and inlet-side seals, then follow the manufacturer's air-clearing procedure.
Can I replace my old filter immediately after connecting a canister?
Visible water flow does not mean new biological media is established. Preserve mature biological filtration during the changeover and monitor aquarium water quality before retiring the old filter.
What should I check before buying canister filter fittings online?
Check the exact filter model, hose dimensions, connector design and manufacturer-approved compatibility. When researching aquarium supplies at Aqua Life Pet & Aquarium, confirm current product details and delivery terms before ordering.
One last thing
Photograph the completed hose route and media arrangement before your first service. Keep those photos with the filter manual so you can restore the correct connections without guessing. A successful installation is not just a pump that starts: it is a setup you can disconnect, maintain and restart without losing track of its water path.