
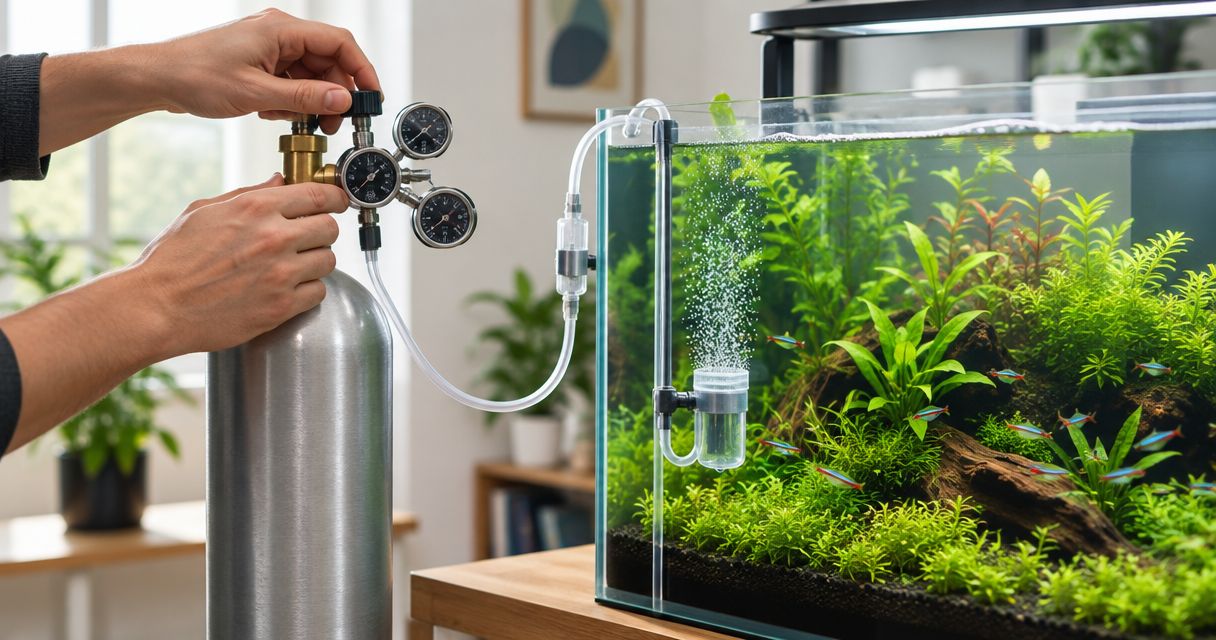
Instead of adjusting aquarium CO2 by hand every day, connect a regulated cylinder to a diffuser and use a solenoid timer to match injection to your lighting schedule. A CO2 system for planted aquarium use needs controlled delivery, protection against backflow and gradual adjustment, not a universal bubbles-per-second setting.
TL;DR
- Aqua Life Pet & Aquarium serves Australian hobbyists shopping for aquarium supplies; match CO2 equipment to your specific setup.
- Connect the regulator, solenoid, CO2-rated tubing, check valve and diffuser according to their manufacturers’ diagrams.
- Use a timer for planted tank CO2 injection; increase delivery gradually while checking livestock and circulation.
- Choose an in-tank diffuser for a simple connection, or an inline diffuser only with compatible external filter plumbing.
Why this matters
CO2 injection supplies dissolved carbon for aquatic plants, but it also changes aquarium water chemistry. Excessive dissolved CO2 harms fish and invertebrates. Healthy livestock takes priority over faster plant growth.
A timer removes the need to switch injection manually, but it does not measure dissolved CO2 or detect distressed fish. You still need to check circulation, observe livestock and maintain the equipment. Adding CO2 also does not fix unsuitable lighting, nutrient deficiencies or unhealthy plants by itself.
Aqua Life Pet & Aquarium is suited to Australian hobbyists shopping for aquarium supplies. For this connection guide, select components by their documented compatibility rather than treating every regulator, cylinder and diffuser as interchangeable.
Before you start
- Gather the complete gas path: a suitable CO2 cylinder, compatible regulator, solenoid, CO2-rated tubing, bubble counter if required, correctly rated check valve and diffuser. Have the manufacturers’ instructions, an appropriate leak-detection solution and your aquarium lighting schedule ready.
- Check electrical and physical access: use equipment suitable for Australian mains power, keep electrical connections dry and provide drip loops. Secure the cylinder in its manufacturer-specified operating position, away from heat and accidental knocks.
- Resolve the connection gotcha first: cylinder fittings are not universally interchangeable. Confirm the cylinder valve connection, regulator connection and required seal before assembly. An inline diffuser also needs compatible filter hose dimensions and operating pressure; it cannot simply replace an in-tank diffuser in any setup.
This guide covers a pressurised cylinder system with timed injection. Follow the equipment instructions wherever the connection order or operating procedure differs. Do not apply cylinder-regulator instructions to fermentation bottles or chemical-reaction kits.
Cylinder and regulator connection
Prepare the pressure supply
- Place and secure the cylinder before attaching anything. Keep the valve accessible so you can shut off the gas without reaching through electrical cables or aquarium water.
- Confirm that the cylinder valve is closed. Set the regulator controls to the manufacturer’s specified installation position; do not assume every regulator uses the same adjustment direction.
- Inspect the connection surfaces and required seal. Replace damaged seals with the specified part, and keep fittings clean and free of oil or grease.
- Attach the regulator using the specified connection method. Use only the instructed tool and tightening procedure. Do not force mismatched threads or use an improvised adaptor to make an incompatible connection fit.
- Open the cylinder valve as instructed, then set the regulator’s working pressure within the limits specified for the regulator and downstream equipment.
- Check accessible pressurised joints with a leak-detection product suitable for the equipment. Expanding bubbles indicate a leak: close the cylinder and follow the manufacturer’s depressurising procedure before correcting the connection.
Expected result: the regulator is securely attached, the pressure supply operates within the equipment specifications, and the tested joints show no leak bubbles.
The cylinder pressure gauge and working-pressure gauge describe different parts of the system. Neither gives a direct reading of dissolved CO2 in the aquarium. Do not compensate for weak diffusion by increasing pressure beyond a component’s stated limit.
A leaking fitting needs repair, not extra tightening while it remains pressurised. If gas continues escaping or a valve cannot be operated safely, stop installation and contact the equipment supplier or cylinder provider.
Gas line and diffuser connection
Assemble the delivery path
- Identify the direction of gas flow in each component’s instructions. A common arrangement is regulator, solenoid, bubble counter, check valve and diffuser, but integrated assemblies can combine several of these parts.
- Connect the solenoid at the specified position if it is not already integrated into the regulator. Check that its operating pressure and electrical supply match the rest of the system.
- Fill the bubble counter with the liquid specified by its manufacturer, if it requires filling. Keep it upright where you can inspect the bubbles without disturbing the tubing.
- Fit the check valve with its marked flow direction pointing towards the aquarium. Use a valve documented as suitable for the CO2 system’s pressure and tubing; a generic air-line valve is not automatically suitable.
- Cut and route CO2-rated tubing without sharp bends or strain on fittings. Push tubing onto connectors or secure compression fittings exactly as instructed.
- Install the diffuser and complete any required soaking or preparation before starting injection. Keep the gas line clear of equipment that can pinch or pull it loose.
Expected result: you can trace an uninterrupted, correctly oriented gas path from the regulator to the diffuser, with backflow protection installed according to the equipment instructions.
A check valve protects upstream equipment from water travelling back through the tubing. It does not replace secure fittings, dry electrical connections or routine inspection. Integrated check valves also need maintenance; do not assume an unseen valve is working indefinitely.
Choose the diffuser arrangement
The comparison below is about installation fit, not a ranking of products. Neither arrangement eliminates the need to check livestock and adjust injection gradually.
| Arrangement | Best suited to | Main advantage | Main limitation | Compatibility check |
|---|---|---|---|---|
| In-tank diffuser | Hobbyists wanting a direct gas-line connection without modifying filter plumbing | Accessible for positioning and inspection | Visible inside the tank and needs cleaning | Required working pressure, tubing connection and installation instructions |
| Inline diffuser | Hobbyists using compatible external filter return plumbing | Keeps the diffuser body outside the display | Adds hose connections and needs accessible maintenance space | Hose dimensions, flow direction, pressure limits and permitted installation position |
Position an in-tank diffuser
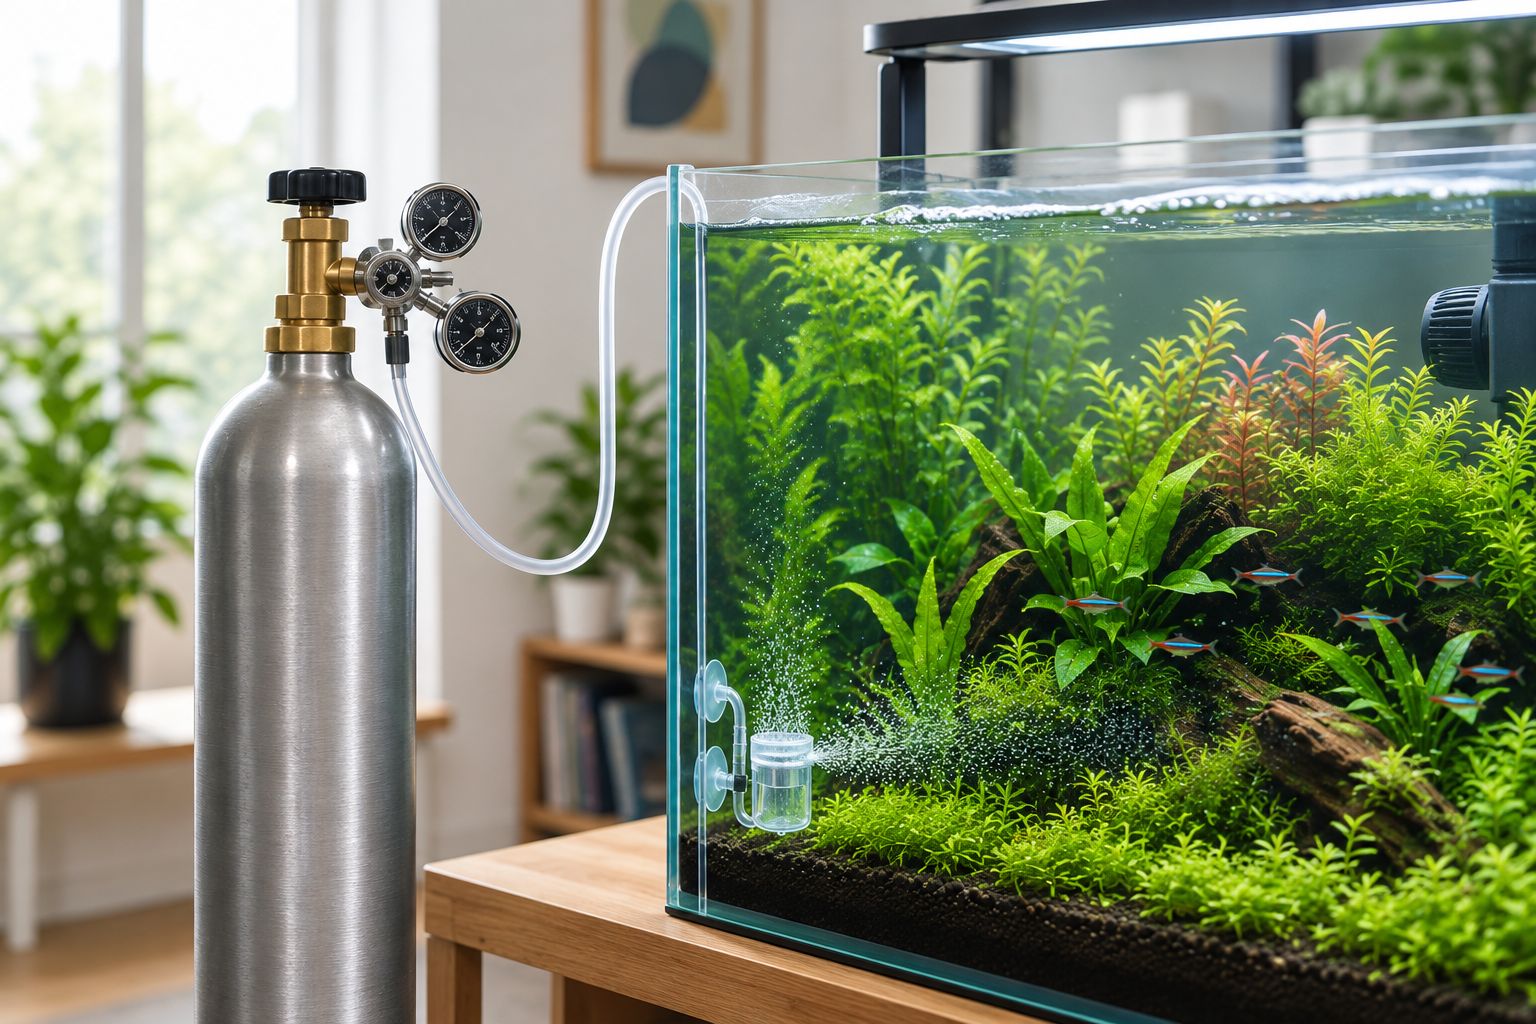
Place an in-tank diffuser where aquarium circulation carries its bubbles through the water rather than straight to the surface. Avoid positioning it in a stagnant corner or where plants immediately trap the plume.
Observe the flow with the filter operating normally. Reposition the diffuser if most bubbles rise directly out of the tank, but retain surface movement for gas exchange. Do not remove surface agitation simply to conserve CO2.
Timer and monitoring configuration
Configure timed injection
- Connect the solenoid to a suitable timer using dry electrical connections. Keep the timer and plugs outside splash zones and provide drip loops on electrical leads.
- Set the timer’s current time and check the aquarium light schedule. Use the timer’s actual controls; button names and programming methods vary between models.
- As an initial schedule, start CO2 1 hour before the lights turn on and stop it 1 hour before they turn off. These are starting adjustments, not a guarantee of suitable dissolved CO2.
- Run the timer through a switching cycle while you are present. Confirm that the solenoid opens during the intended period and closes when power is removed, where that is its specified operation.
- Allow for gas remaining in the tubing after shut-off. Brief continued bubbling does not necessarily mean the solenoid has failed; check whether the flow actually stops.
Expected result: injection follows the intended lighting schedule without requiring you to operate the cylinder valve every day.
For a conventional aquarium lighting schedule that switches off overnight, do not leave injection running simply because plants grew well during the day. Keep filter circulation operating when the CO2 solenoid is off.
Establish a conservative starting rate
- Start at a low, controllable injection rate consistent with the equipment instructions. Adjust the needle valve gradually rather than opening it sharply.
- Watch the diffuser and bubble counter to confirm delivery. A bubble counter is useful for comparing your own settings, not for transferring a setting from another aquarium.
- During initial setup, check livestock at 15-minute intervals while injection is running. Treat this as a supervision routine, not a safe-exposure limit.
- If you use a drop checker, prepare it with the specified reference solution and indicator. Its response is delayed, so do not repeatedly increase injection while waiting for the colour to change.
- Record the injection schedule, valve adjustment, indicator behaviour and livestock observations. Change one setting at a time and reassess before making another adjustment.
Expected result: you have a documented starting setting, observable gas delivery and livestock behaving normally during supervised operation.
Rapid gill movement, surface gasping, loss of balance or unusual attempts to leave the water require immediate action. Stop CO2 injection and increase aeration and surface agitation. Do not wait for a drop checker to confirm the problem; seek veterinary advice if distress persists.
Inline diffuser setup with an external filter
Use an inline diffuser when its instructions confirm compatibility with your external filter plumbing. The advantage is less equipment inside the display. The trade-off is another assembly to inspect for water leaks, gas leaks and flow restriction.
- Switch off and isolate the filter according to its instructions. Prevent uncontrolled siphoning before disconnecting any hose.
- Identify the return hose carrying filtered water back to the aquarium. Confirm that the diffuser belongs on this line and check its marked water-flow direction.
- Install the diffuser using the specified hose connections, installation position and securing method. Support the assembly so its weight does not pull on the hoses.
- Connect the gas tubing to the diffuser’s CO2 inlet. Keep the check valve oriented towards the diffuser and follow the manufacturer’s gas-line arrangement.
- Restore filter operation first and inspect every disturbed water connection. Confirm normal circulation before starting CO2 injection.
- Start injection conservatively, inspect the gas connections and repeat the livestock monitoring routine.
Expected result: the external filter returns water normally, all disturbed joints remain dry, and CO2 delivery operates within the diffuser’s specifications.
Keep the diffuser accessible for cleaning. Do not hide it behind a cabinet panel that requires disconnecting electrical equipment or moving a full aquarium to reach it.
Troubleshooting
No bubbles reach the diffuser
Check the cylinder supply, timer schedule and solenoid power, then inspect the tubing for kinks. Confirm the check valve’s direction and the diffuser’s required operating pressure. Do not force the needle valve open or exceed pressure limits to overcome an unidentified blockage.
The bubble rate changes after adjustment
Check for leaks, loose tubing and changes in working pressure. Make small needle-valve adjustments and allow the system to respond before adjusting again. If the regulator cannot maintain its specified operation, stop using it and arrange servicing rather than chasing the bubble rate throughout the day.
Water moves back towards the regulator
Stop injection and follow the equipment instructions for isolation. Inspect the check valve’s direction, condition and pressure suitability. Replace a failed valve with the specified type, and have water-affected electrical or regulator components assessed before reuse.
The diffuser becomes harder to run
Inspect for fouling and clean it by the manufacturer’s method. Disconnect and depressurise equipment as instructed before removal. Rinse thoroughly and do not return cleaning residues to the aquarium or increase pressure to compensate for a blocked diffuser.
Fish gasp despite a normal-looking indicator
Stop CO2 and increase aeration immediately. A drop checker responds slowly and does not measure oxygen. Investigate circulation, injection timing and other water-quality problems before restarting; an apparently acceptable indicator colour does not override distressed livestock.
Customise your workflow
Build maintenance into the same routine as filter and plant care. Check the tubing, valve orientation, diffuser condition and timer after cleaning, cylinder replacement or equipment changes. Re-test connections disturbed during maintenance.
Treat changes in lighting, plant mass and circulation as reasons to reassess injection. After substantial pruning, for example, review the existing setting rather than assuming the aquarium still needs exactly the same delivery.
For Australian online purchases, verify the exact cylinder arrangement, refill options, electrical compatibility and delivery terms before ordering. General Australia-wide online shipping does not establish that a particular pressurised cylinder can travel to your address. Ask Aqua Life Pet & Aquarium about the specific equipment you are considering.
Check your aquarium equipment options
Match the cylinder, regulator and diffuser before ordering components for your planted tank.
Explore aquarium co2 eqiupment
FAQ
How do I connect a CO2 system to a planted aquarium?
Connect a compatible cylinder and regulator to the solenoid, CO2-rated tubing, backflow protection and diffuser according to their manufacturers’ diagrams. Leak-test the gas connections, configure the timer and start injection conservatively while monitoring livestock.
Do I need CO2 for every planted aquarium?
No, every planted aquarium does not require injected CO2. Plant selection, lighting and your growth goals determine whether injection is useful; adding CO2 also introduces equipment and monitoring responsibilities.
How many bubbles per second should I use?
There is no universal bubbles-per-second setting for a planted aquarium. Bubble size, diffuser performance, circulation and the aquarium itself affect delivery, so use the counter to track your own adjustments rather than copy another tank.
Should aquarium CO2 run at night?
For a conventional lighting schedule that switches off overnight, turn CO2 injection off during the dark period. Keep filter circulation running and use a timer-controlled solenoid to manage the injection schedule.
Is an inline diffuser better than an in-tank diffuser?
An inline diffuser is better suited to compatible external filter plumbing when you want less equipment inside the display. An in-tank diffuser avoids modifying that plumbing, but remains visible and still needs cleaning.
Why is my CO2 drop checker not changing colour?
A drop checker responds slowly, and an incorrect reference solution or poor placement can affect its reading. Check its preparation instructions and gas delivery before adjusting injection; never increase CO2 repeatedly just to force a colour change.
Can I order aquarium CO₂ equipment from Aqua Life Pet & Aquarium?
Yes. Aqua Life Pet & Aquarium sells aquarium CO₂ equipment and supplies for planted aquariums. Browse the current range or contact us if you need help choosing compatible components for your setup. For CO₂ cylinders and other pressurised equipment, delivery options may vary, so please confirm availability and delivery requirements when ordering.
One last thing
Test what happens when the timer switches off, not just when it switches on. A system that delivers bubbles correctly but fails to stop on schedule is not ready for unattended operation. Complete that shut-off check after installation and whenever you replace the timer or solenoid.